
Creating a REST API with NestJS
A guide to create a simple REST API using NestJS, please have in mind that not data base was used here, in a future post, I will integrate the REST API with a data base.
This post was made with the purpose of actually learning NestJS myself, so, if you see things I can improve, please let me know here, I'll appreciate it.
Basic Set up
NestJs installation:
npm i -g @nestjs/cli
Project creation:
nest new project-name
In the project creation it will ask you to use npm or yarn, use as you wish, I used yarn this time.
After installation, go to your new folder
cd project-name
and run project
yarn run start
and there you go!! open http://localhost:3000/ and you will have your new project running.
Note: While developing, I will use yarn run start:dev command, that is going to start watching my changes and applying what I do, what do I mean with this, by default, when you start your project, if you make you changes, you will NOT see them if you reload http://localhost:3000/, you would have to stop your server and start it again, that's not help full, so, with yarn run start:dev, it will start watching for file changes and when you reload your server URL, they will be applied, this will work kinda like the nodemon tool.
Basic Route Change
By default, opening http://localhost:3000/ will call the default getHello() method that has the decorator @Get() in the AppController class, so, let's edit it:
Changing the controller
Open your file src/app.controller.ts, you will see the decorator @Controller(), let's change that controller to @Controller("api"), now if you access / is going to give you a 404 error, but if you access http://localhost:3000/api you will see your Hello World again
Changing the method
You can change the method url as well, so to make your getHello() method work in another url lets edit its decorator @Get() to @Get("get-message")
Now / and /app aren't going to work, they will fire 404, the route http://localhost:3000/api/get-message is the one firing our getHello() method now with the message Hello world!
Environment variables
yarn add dotenv or (npm install dotenv) is going to be used to set the Environment variables in a .env file and imported to the project.
Later in our file /src/main.ts we import it like this import 'dotenv/config'; to have the environment variables in our project.
Now, in our root folder, let's create a file called .env, there, set the route to your PORT to any number like:
PORT = 3001
and then in your /src/main.ts:
//PORT equal to 3001, the one we set up before or 3000 if not process.env.PORT found
const PORT = process.env.PORT || 3000
...
// later put you app to listen PORT instead of the default `3000`
await app.listen(PORT);
Using the CLI
As any other modern framework, NestJs has a CLI (Command-line interface) that we can make use of to make our lives better, this is the CLI docs https://docs.nestjs.com/cli/usages
Creating a new module
nest g mo people to generate(g) a new module(mo) people under the folder src/people
Basic module set up
In the file src/people/people.module.ts, in the module decorator, we can set up the imports, controllers and provides for future use:
@Module({
    imports:[],
    controllers:[],
    providers:[]
})
Now let's create the controller(co) with CLI
nest g co people/controller/peopleand this will create the classPeopleControllerand it will attach it to ourcontrollersin@Moduledecorator in our classPeopleModuleLater, the service(s):
nest g s people/service/people, this will create the classPeopleServiceand it will attach it to theprovidersin our module
People model
Under people module, lets create a new model model/person.model.ts that will look like this:
export class PersonModel {
  constructor(
    public id: number,
    public name: string,
    public age: number,
    public email: string,
  ) {}
}
Editing the service
In our service, we are going to create a method called save and it will push to the array people a new person wit the type PersonModel, this is how the service will look like:
import { Controller } from '@nestjs/common';
import { PersonModel } from 'src/people/model/person.model';

@Controller('people') // notice I changed the @Injectable() decorator
// created by default for nest CLI with the @Controller one and set it to 'people'

export class PeopleService {
  // this is the array people where we push the new person, so, it is an array type <PersonModel>
  private people: Array<PersonModel> = [];

  // The method save is going to receive the parameters we need to send to the PersonModel
  save(name: string, age: number, email: string): any {
    // Creating an random id
    const id: number = Math.floor(Math.random() * 10000 + 1);
    // Creating a new person
    const person = new PersonModel(id, name, age, email);
    // Pushing the person to people array
    this.people.push(person);

    return id;
  }
}
After building save(), let's create more methods.
  // It will list all people
  list(): Array<PersonModel> {
    // Let's return a copy, so, in case, for any reason, the controller edits the array,
    // it edits the copy and not the original one
    return [...this.people];
  }

  // It will return only one person
  getPerson(id: number) {
    const data = this.searchPerson(id);
    if (data === null) return null;
    // Let's return a copy as well
    return { ...data.person };
  }

  // It will edit the person checking for every field, if that field is not null
  // then it means it was edited and should be added to the edited object
  edit(id: number, name: string, age: number, email: string): boolean {
    const data = this.searchPerson(id);
    if (data === null) return null;
    const person = this.people[data.index];

    if (name != null) {
      person.name = name;
    }
    if (age != null) {
      person.age = age;
    }
    if (email != null) {
      person.email = email;
    }
    this.people[data.index] = person;
    return true;
  }

  // internal function that is going to search for an specific person
  // and return the person and it's index in the people array
  searchPerson(id: number): { person: PersonModel; index: number } {
    const index = this.people.findIndex(e => e.id === id);
    if (index === -1) return null;

    const person = this.people[index];
    return { person, index };
  }
so now that we have our service, we are going to inject it in our controller and create our new @Post() like this:
import { Controller, Post, Body } from '@nestjs/common';
import { PeopleService } from 'src/people/service/people/people.service';

@Controller('people')
export class PeopleController {
  constructor(private _peopleService: PeopleService) {}

  @Post()
  save(
    @Body() name: string,
    @Body() age: number,
    @Body() email: string,
  ): { ok: boolean; id: number } {
    const id = this._peopleService.save(name, age, email);

    return { ok: true, id };
  }
}
So there, we have our save() method with the decorator @Post(), the save() method receive some parameters from the body, that's why we use @Body(), and later call the method save from _peopleService.
Now, you can see that using @Body() for each parameter is not very convenient, so, we are going to use DTO'S
DTO
DTO stands for Data Transfer Object, it is a concept that comes from java, so, that's it, a DTO is basically an object that defines how we are going to send the data to the server, and using it with class-validator, we can validate that data before sending that data over. So, probably we are using them more frequently on Post, Put operations.
So, first, let's install yarn add class-validator or (npm install class-validator) and yarn add class-transformer or (npm install class-transformer)
Later on our main.ts file, let's add:
...
async function bootstrap() {
  const app = await NestFactory.create(AppModule)
  app.useGlobalPipes(new ValidationPipe())  await app.listen(PORT)
}
...
Later on, let's create the file /src/people/dto/person-create.dto.ts with the next content:
import { IsNotEmpty, IsEmail, IsInt, Min } from 'class-validator';
export class PersonCreateDto {
  // this is the validator decorator
  // you can create a custom message by adding an {message: "String"}
  @IsNotEmpty({ message: 'Name is required' })
  readonly name: string;

  @IsEmail()
  readonly email: string;

  @IsInt()
  @Min(1, { message: 'It needs to have at least one number' })
  readonly age: number;
}
As simple as that, you will have the DTO schema with validators to be used in the controller.
You can find all the validator decorators here: https://github.com/typestack/class-validator#validation-decorators
Applying the DTO
Now our controller src/people/controller/people/people.controller.ts should look like this:
import { Controller, Post, Body } from '@nestjs/common';
import { PeopleService } from 'src/people/service/people/people.service';
import { PersonCreateDto } from 'src/people/dto/person-create.dto';
@Controller('people')
export class PeopleController {
  constructor(private _peopleService: PeopleService) {}

  @Post()
  save(@Body() personCreateDto: PersonCreateDto): { ok: boolean; id: number } {    const id = this._peopleService.save(
      personCreateDto.name,      personCreateDto.age,      personCreateDto.email,    );

    return { ok: true, id };
  }
}
We replace all the @Body() for a single one using the PersonCreateDto class in the parameter, and we send that information to the _peopleService.save() method.
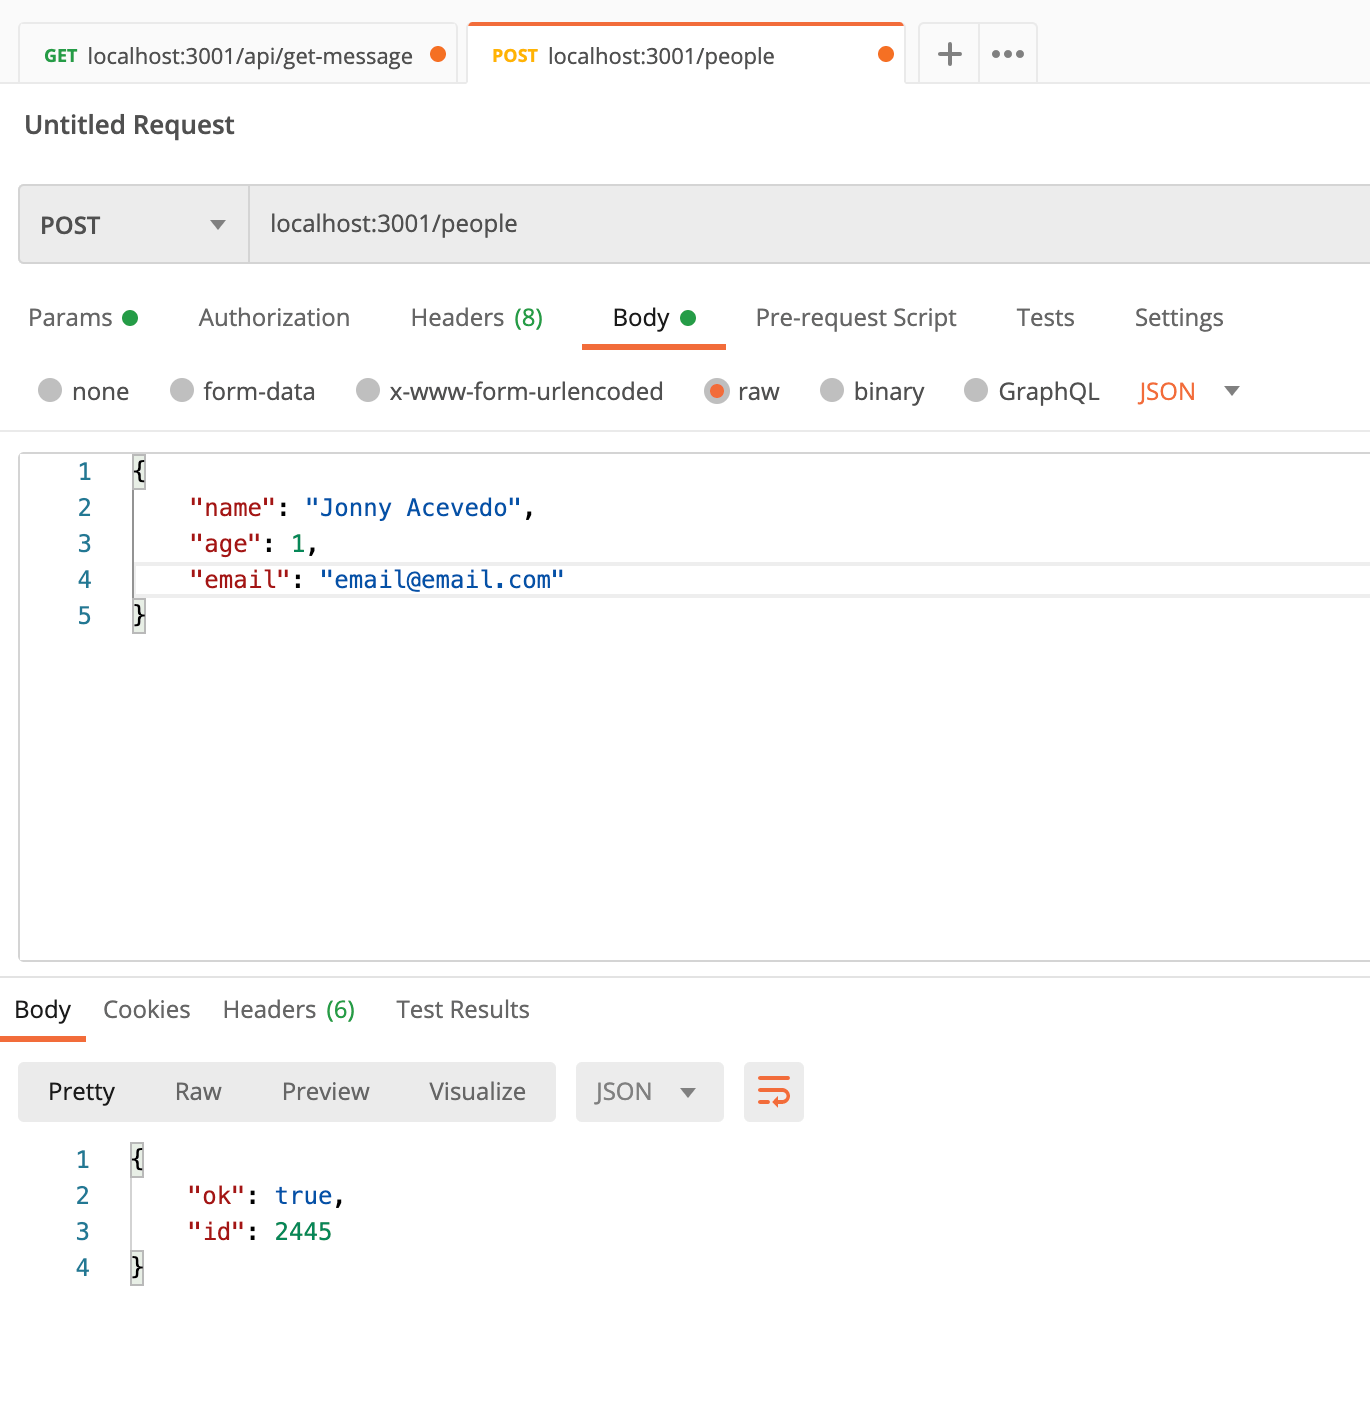
if you try your REST api in postman, we should be able to see something like this on the url http://localhost:3001/people
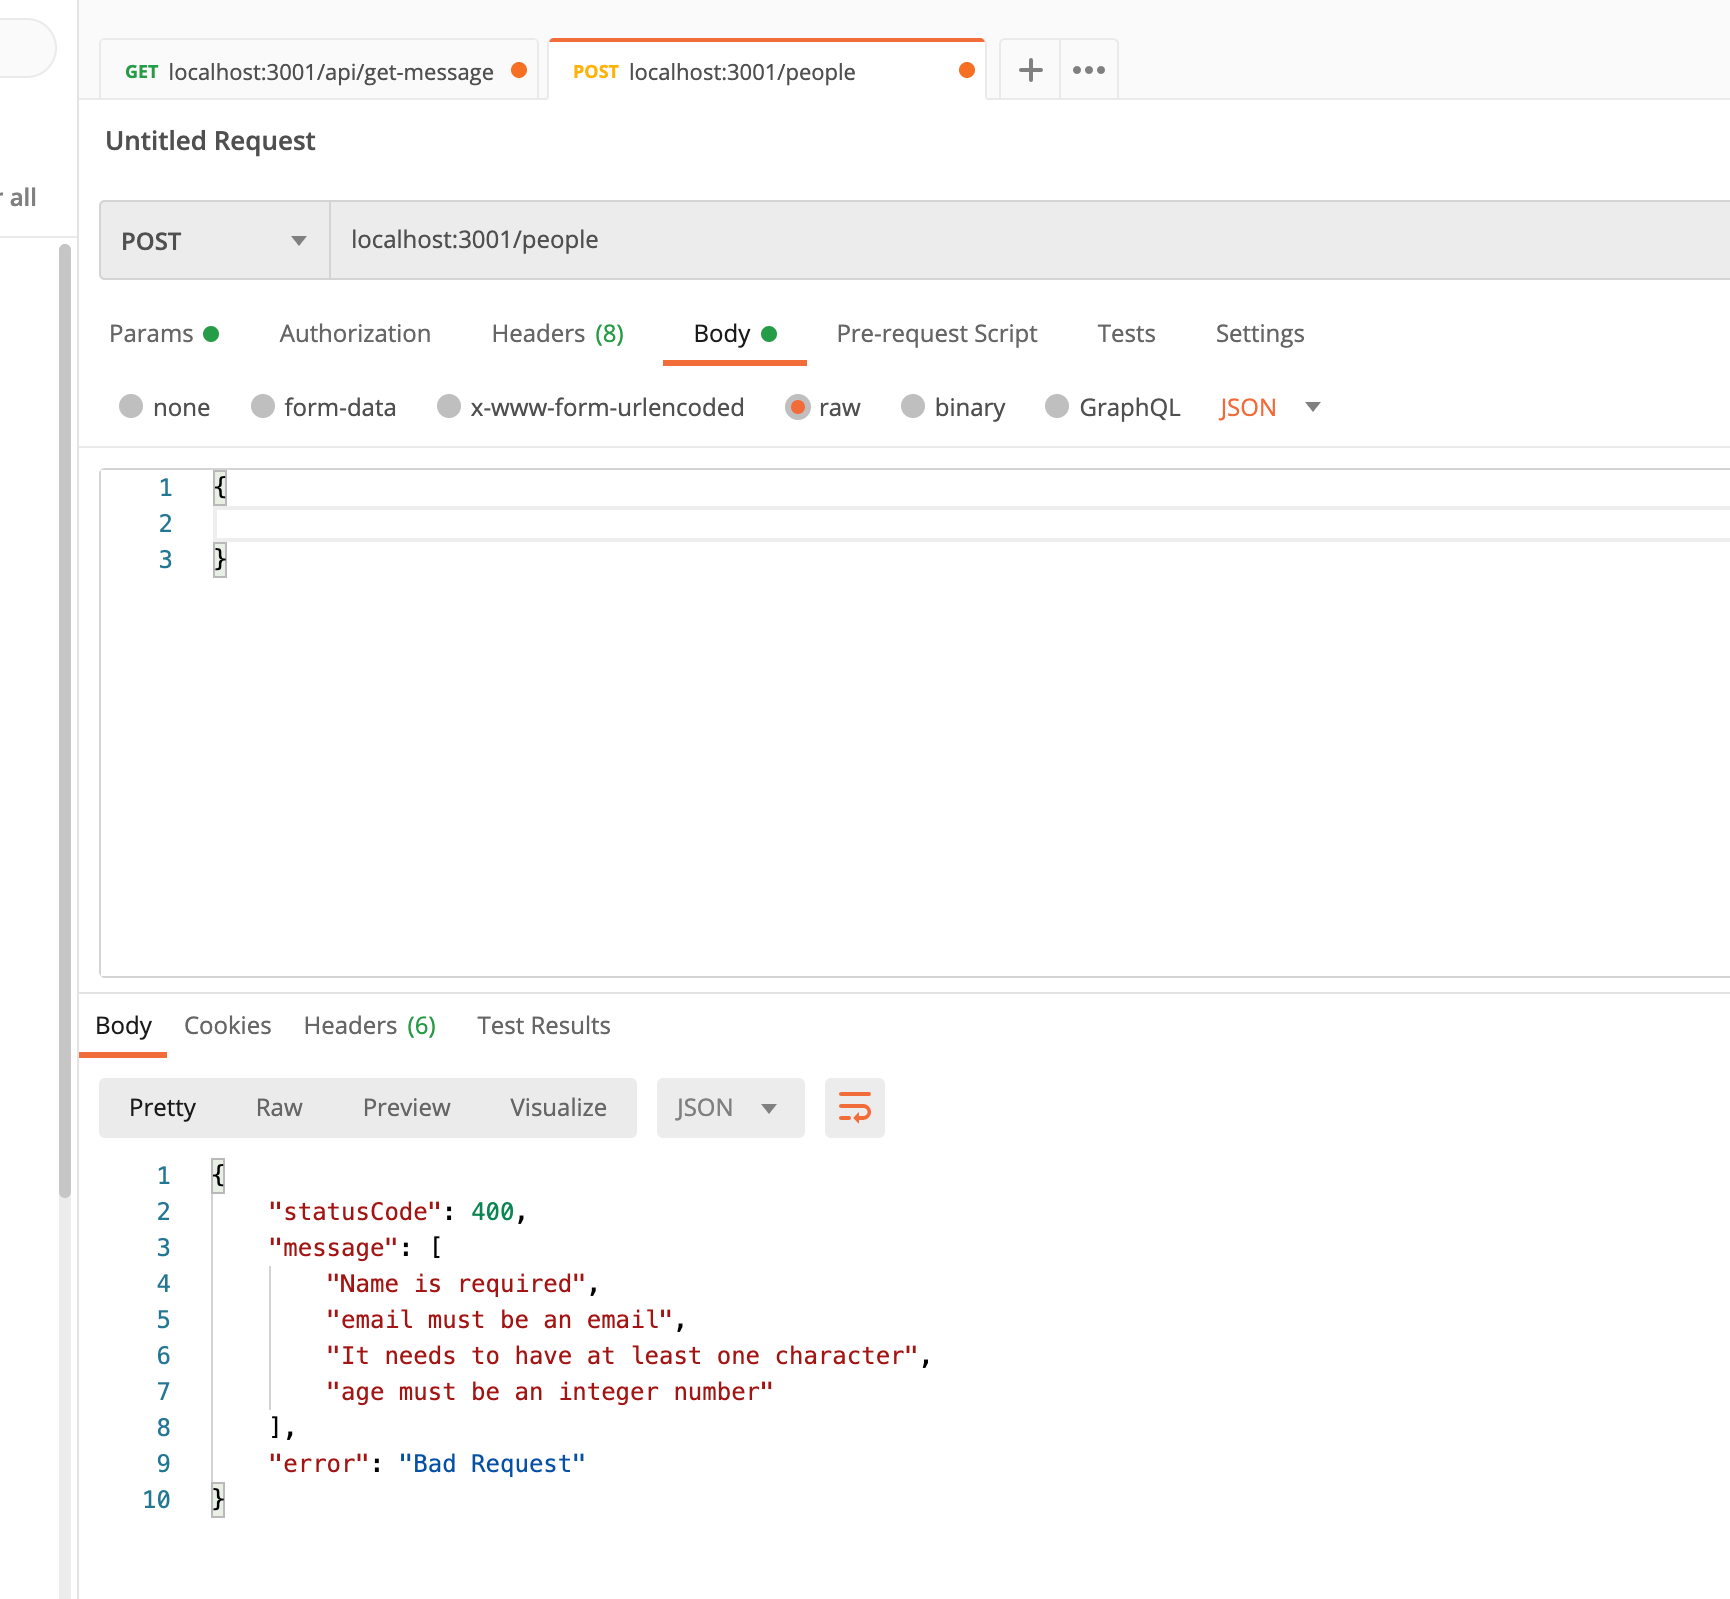
and to test the validations that we just made, we send an empty object in the body, and we will see all the error messages for each validator we have in our DTO
Now that the fundamentals are set, we are just going to add more methods in our controller to handle @Post(), @Get(), @Get(':id'), @Patch(':id'), @Delete(':id') and it should look like this:
Controller
/src/people/controller/people/people.controller.ts
import { Controller,Post, Body, Get, Patch, Param, HttpException, HttpStatus, Delete,} from '@nestjs/common';
import { PeopleService } from 'src/people/service/people/people.service';
import { PersonCreateDto } from 'src/people/dto/person-create.dto';
import { PersonModel } from 'src/people/model/person.model';
import { PersonEditDto } from 'src/people/dto/person-edit.dto';

@Controller('people')
export class PeopleController {
  constructor(private _peopleService: PeopleService) {}

  @Post()
  save(@Body() personCreateDto: PersonCreateDto): { ok: boolean; id: number } {
    const id = this._peopleService.save(
      personCreateDto.name,
      personCreateDto.age,
      personCreateDto.email,
    );

    return { ok: true, id };
  }

  @Get()
  list(): Array<PersonModel> {
    return this._peopleService.list();
  }

  @Get(':id')
  listSinglePerson(@Param('id') id: string) {
    const idToNumber: number = parseInt(id);
    const response = this._peopleService.getPerson(idToNumber);
    if (response == null) {
      throw new HttpException(
        {
          status: HttpStatus.NOT_FOUND,
          error: 'Person not found',
        },
        404,
      );
    }

    return response;
  }

  @Patch(':id')
  edit(@Param('id') id: string, @Body() personEditDto: PersonEditDto) {
    const idToNumber: number = parseInt(id);
    const response = this._peopleService.edit(
      idToNumber,
      personEditDto.name,
      personEditDto.age,
      personEditDto.email,
    );
    if (response == null) {
      throw new HttpException(
        {
          status: HttpStatus.NOT_FOUND,
          error: 'Person not found',
        },
        404,
      );
    }

    return {
      ok: true,
    };
  }

  @Delete(':id')
  delete(@Param('id') id: string) {
    const idToNumber: number = parseInt(id);
    const response = this._peopleService.delete(idToNumber);
    if (response == null) {
      throw new HttpException(
        {
          status: HttpStatus.NOT_FOUND,
          error: 'Person not found',
        },
        404,
      );
    }

    return {
      ok: true,
    };
  }
}
Service
src/people/service/people/people.service.ts
import { Controller } from '@nestjs/common';
import { PersonModel } from 'src/people/model/person.model';

@Controller('people')
export class PeopleService {
  private people: Array<PersonModel> = [];

  save(name: string, age: number, email: string): any {
    const id: number = Math.floor(Math.random() * 10000 + 1);
    const person = new PersonModel(id, name, age, email);
    this.people.push(person);
    return id;
  }

  list(): Array<PersonModel> {
    // Let's return a copy, so, in case, for any reason, the controller edits the array, it edits the copy and not the original
    return [...this.people];
  }

  getPerson(id: number) {
    const data = this.searchPerson(id);
    if (data === null) return null;
    // Let's return a copy as well
    return { ...data.person };
  }

  edit(id: number, name: string, age: number, email: string): boolean {
    const data = this.searchPerson(id);
    if (data === null) return null;

    const person = this.people[data.index];

    if (name != null) {
      person.name = name;
    }
    if (age != null) {
      person.age = age;
    }
    if (email != null) {
      person.email = email;
    }
    this.people[data.index] = person;
    return true;
  }

  delete(id: number): boolean {
    const data = this.searchPerson(id);
    if (data === null) return null;

    this.people.splice(data.index, 1);
    return true;
  }

  searchPerson(id: number): { person: PersonModel; index: number } {
    const index = this.people.findIndex(e => e.id === id);
    if (index === -1) return null;

    const person = this.people[index];
    return { person, index };
  }
}
and how you can tell, a new DTO (personEditDto) was created for the edit method in the controller, so, here it is:
import { IsEmail, IsOptional } from 'class-validator';
export class PersonEditDto {
  readonly name: string;

  @IsOptional()
  @IsEmail()
  readonly email: string;

  readonly age: number;
}
I'm sorry if I took a big jump at the end, writing isn't easy at all, but, as you can tell, creating the other methods in the controller besides @Post() aren't that hard and it's kinda, to repeat the same things.
- Create the method in the controller
- Create the method in the service, and play with the array according of what we need the method to do
- Create DTO if needed
- Use the method from the service in the method in the controller.
After you are done with them and with this code base, you should be able to access: http://localhost:3001/people on Get, Post, and http://localhost:3001/people/<userd_id> for decorators Get(':id'), Patch(':id') and @Delete(':id').
Thank you so much for reading, I hope this post was useful for you as it was for me while learning RestJS.
The full repository can be found here:
https://github.com/jonnyisdeveloping/nestjs-rest-api/tree/master/rest-api